Convert VirtualBox VDI to QEMU QCOW2 Image
VirtualBox and QEMU/KVM are two popular virtualization solutions that offer different features and capabilities. If you've decided to migrate from VirtualBox to QEMU/KVM, you may be wondering can i convert my existing VirtualBox VMs to QEMU/KVM? The answer is yes! You can easily convert your existing VirtualBox virtual machine (VM) images to a format compatible with QEMU/KVM.
In this guide, we'll walk you through the process of converting a VirtualBox VDI (Virtual Disk Image) file to a QEMU QCOW2 (QEMU Copy On Write Version 2) image using Virt-Manager QEMU/KVM. This allows you to seamlessly transfer your virtual machines from VirtualBox to QEMU/KVM without the need for a complex conversion process.
Step 1: Locate Your VirtualBox VDI File
First, you'll need to locate the VirtualBox VDI file of the virtual machine you want to convert. By default, VirtualBox stores VM images in the ~/VirtualBox VMs directory, followed by the name of your VM. The VDI file typically has the same name as your VM.
For example, if your VM is named "MyVM," the VDI file could be located at:
~/VirtualBox VMs/MyVM/MyVM.vdi
Step 2: Convert VDI to QCOW2
Now that you've located your VDI file, open your terminal and run the following command to convert it to the QCOW2 format:
sudo qemu-img convert -f vdi -O qcow2 /path/to/your/VDI/file.vdi /path/to/destination/QCOW2/file.qcow2
Replace /path/to/your/VDI/file.vdi with the actual path to your VDI file and /path/to/destination/QCOW2/file.qcow2 with the desired path and name for the QCOW2 file.
For example, if your VDI file is located at ~/VirtualBox VMs/MyVM/MyVM.vdi and you want to save the QCOW2 file in the same directory with the name MyVM.qcow2, you can use the following command:
sudo qemu-img convert -f vdi -O qcow2 ~/VirtualBox\ VMs/MyVM/MyVM.vdi ~/VirtualBox\ VMs/MyVM/MyVM.qcow2
Once the process is complete, you should see the QCOW2 file in the specified destination. You can now use this QCOW2 file with Virt-Manager QEMU/KVM to import it into an existing one.
Step 3: Import existing disk image
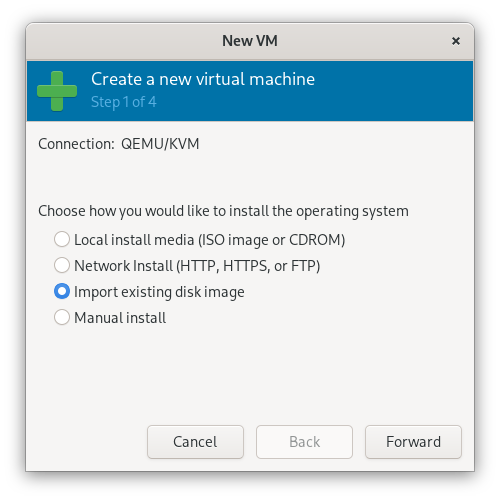
Open your virt-mangaer QEMU/KVM. Add a new vm as usual, but this time as an import file.
- Click
Create a new virtual machineand then clickImport existing disk image

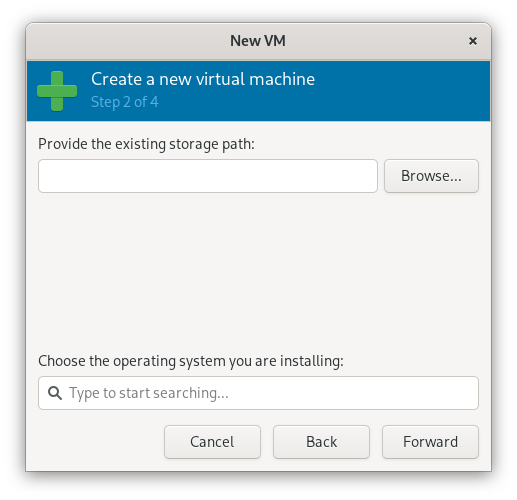
- Now browse the image file and select the actual location of the converted qcow2.

And Just follow the step do it, I haven't used virtualbox for a long time, and I don't want to install it, so I don't have any pictures, but the process is very simple, just follow the guide.